


Introduction
Open Source projects are usually driven by volunteers. They don’t have to work on the project, they want to. This often leads to contributors working on interesting new features rather than the boring work running tests, cutting releases, and rooting out vulnerabilities. This makes sense – new features are more fun – but the boring work still needs to get done. The key to keeping an open source project productive is automation. The more process drudgery that can be automated, the more time there is to work on the cool stuff, and the end result is better software.
In this post I’ll show you how to update your open source JavaScript (or TypeScript) project to
Use code tools that keep your code clean and safe.
Make it easy for contributors to use these tools as well.
Run these tools frequently in the cloud.
Automate the release process to publish your project correctly every time
Though I’m focusing on JavaScript and TypeScript projects, the general principles apply to projects in any language.
Note: Throughout this project we are going to level up and automate our automation tools with Trunk Check, a free command line tool to install and manage other dev tools. Everything we will do can also be done manually using those tools directly, but Trunk Check makes the process faster and easier.
Start with a Repo
I’ve created an example repo to walk you through the steps and see the before and after. However, feel free to use one of your real projects. Nothing we are doing will damage your code or be irreversible.
Start by forking and cloning this example repo from GitHub. It’s a simple Typescript library that produces a module. I kept it simple for the sake of this tutorial, but the setup is identical to what I use on my real library PureImage.
Trunk Init
Open a terminal and install Trunk Check with
1curl https://get.trunk.io -fsSL | bash
or use one of the alternative install methods.
Inside the directory where you checked out the tutorial repo (or your own repo) run trunk init. This will quickly set up the Trunk tools in your repo. Trunk Check will automatically scan your project and set up appropriate defaults for your project type. Accept the defaults if it asks you any questions.
The first thing you'll notice is that Trunk Check automatically detected that I’m using NodeJS to build, so it enabled osv-scanner to scan the project’s packages looking for security vulnerabilities. It also enabled oxipng to optimize PNGs and JPGs. You can see all of the available tools with trunk check list. The ones with a check next to them are enabled.
Now run trunk check. It won’t show much (or maybe anything) because by default it only looks at recent changes in your git repo, which may not have any issues. Now run trunk check --all to scan all changes, no matter how old.
There are only a few issues caught in my test repo because it’s so small, but a real project could easily have hundreds or thousands of issues depending on the size of the codebase. Of course we could fix all of these immediately but that takes a lot of time we don’t have. That’s why Trunk Check only checks the new changes by default. This is called Hold The Line and is one of the big advantages of having Trunk manage the tools for us instead of doing it manually. Now let's get the rest of our system configured.
Configuring ESLint and Prettier
A linter is a tool that scans your code looking for issues that could lead to bugs, vulnerabilities, and inconsistent code styles. Generally these tools are language specific and report found issues but don’t fix them. A beautifier is a related tool (sometimes also called a linter) that enforces and auto-fixes style rules like indentation, sorting imports, and semicolon placement.
Since this is a JavaScript/TypeScript project I would like to use ESLint, an excellent open source linter for JavaScript. Trunk Check will enable ESLint support if it detects that the project is already using it but since I haven’t set it up yet Trunk Check skipped it. Let’s configure ESLint now by running npm init @eslint/config and follow the prompts. The installer will ask you if you want ESLint to check syntax only, to check syntax and find problems, or to also enforce code style. I recommend you do not use ESLint for enforcing code style. We will use a better tool for that: Prettier.
Now tell Trunk about ESLint with trunk check enable eslint. Trunk will use ESLint whenever you run trunk check and keep it up to date, using the defaults in the .eslintrc.json file (or whichever file you choose during the ESLint installation). Personally, I like my JavaScript imports to be sorted alphabetically, so I installed the eslint-plugin-simple-import-sort package and added it to my .eslintrc.JSON file.
1...2"extends": ["eslint:recommended",3 "plugin:@typescript-eslint/recommended"],4...5"rules": {6 "simple-import-sort/imports": "error"7 }8...
Prettier is code formatter with support for many programming languages. Let’s enable it with trunk check enable prettier. Prettier has good defaults and does not require a config file, but I like my code to not use semicolons (they are optional in JavaScript), so I created a .prettierrc.json file with just this one line:
1{2"semi": false3}
Now commit all of the changes we’ve made to the repo. You’ll notice a new .trunk directory. That’s where all of Trunk’s config files are. Whenever you do a git commit Trunk Check will apply eslint, prettier, and the other tools before it lets the code be committed, but only on changed lines. If Trunk Check finds an issue it will flag the problem and (if applicable) offer to fix it. These checks help improve the codebase over time, and share these checks with anyone else who builds the project.
Building and Testing
Now that our code is being linted and formatted correctly, let’s look at the build system. While it is possible to ship JS libraries without any build system, many developers run their code through a bundler or optimizer, plus a compiler when using TypeScript. Whatever your setup, you probably want it to run fast.
The official TypeScript compiler tsc is very good and finds every error with excellent output; however it is quite slow, and that slowness grows as the project gets bigger. That’s why I switched to using esbuild during development. esbuild still compiles TypeScript into JavaScript, but skips the checking. This makes it super fast. This is my setup for building and bundling:
1"build": "esbuild --bundle src/index.ts --outdir=dist"
The --bundle argument says that I want to bundle all of my files into a single output file. The src/index.ts file is the root of my project. esbuild will automatically follow the imports to pull in every file in my codebase.
Unit Tests
I used to use Jest in my pure JavaScript projects for unit testing. However, when I switched to TypeScript I was not able to get Jest to work both with Typescript and ESM (modern JS modules) at the same time, so I switched to a great replacement: Vitest. Vitest works out of the box with ESM and Typescript. It also plays nicely with my preferred IDE (JetBains WebStorm) and is very fast.
1"scripts":{2 "vitest": "vitest run --dir test",3 "type-check": "tsc",4 "test": "npm run vitest && npm run type-check",5}
Above is the setup I’m using for testing in my package.json file. Notice there are commands for both the unit tests with vitest and type checking with type-check. If I run npm test it will automatically run both types of tests. This lets me run just the parts I want during development, while still having a single test command for automation.
Review Your package.json
The package.json file is the most important file in a JavaScript/TypeScript project. It defines exactly which files and settings are used to build a module. The JavaScript ecosystem has gone through many packaging and distribution changes over the years but has finally settled on EcmaScript Modules (ESM). Some packages use older formats like Common JS and then have a bundler produce the final ESM modules. I’ve had much more success using ESM from the get go, with access to all of the recent Javascript language features, and then using a build tool to generate the older module formats if necessary (usually they aren't).
This is my complete package.json file
1{2 "name": "trunk_library_tutorial",3 "version": "1.0.0",4 "description": "",5 "type": "module",6 "module": "dist/index.js",7 "types": "dist/index.d.ts",8 "scripts": {9 "vitest": "vitest run --dir tests",10 "type-check": "tsc",11 "test": "npm run vitest && npm run type-check",12 "build": "esbuild --bundle src/index.ts --outdir=dist"13 },14 "author": "",15 "license": "MIT",16 "devDependencies": {17 "@typescript-eslint/eslint-plugin": "^6.9.0",18 "@typescript-eslint/parser": "^6.9.0",19 "eslint": "^8.48.0",20 "eslint-config-prettier": "^9.1.0",21 "eslint-plugin-simple-import-sort": "^10.0.0",22 "typescript": "^5.2.2",23 "vitest": "^1.2.2"24 }25}
First, check that type is set to module, and that module and types are set to the correct paths. The package.json file supports browser and main properties as well, but you can leave those out unless you need to support older formats. You’ll notice there’s also a clean and release command. Those are for later when we start publishing the module.
Now let’s check that everything is still working and commit the changes.
1npm run clean2npm run test3npm run build
The final generated files are index.js and the *.d.ts files in the dist directory. Now that we can build the project locally, let’s automate it.
Continuous Integration
One of the biggest shifts in software development in the last twenty years is the use of Continuous Integration systems (often called CI). These are services that build and test your code whenever anyone pushes a change to your repo. The shift to CI happened because having a little robot always checking your code is fantastic for developer productivity. If something breaks – anywhere in the system – you know about it immediately. If you keep your CI green (meaning no errors) then you always have code you can ship immediately, even if some features are disabled with feature flags.
CI tools have greatly increased the velocity of software development over the years and has made way for continuous deployment (CD) as well, where web based software may be updated multiple times a day. We won’t get into CD today since we are focused on libraries, but we will set up a CI system.
CI systems can be complex and expensive to set up. There are many commercial solutions to recommend, but if you are using GitHub you can actually use GitHub Actions as a free CI system.
Setup Github Actions
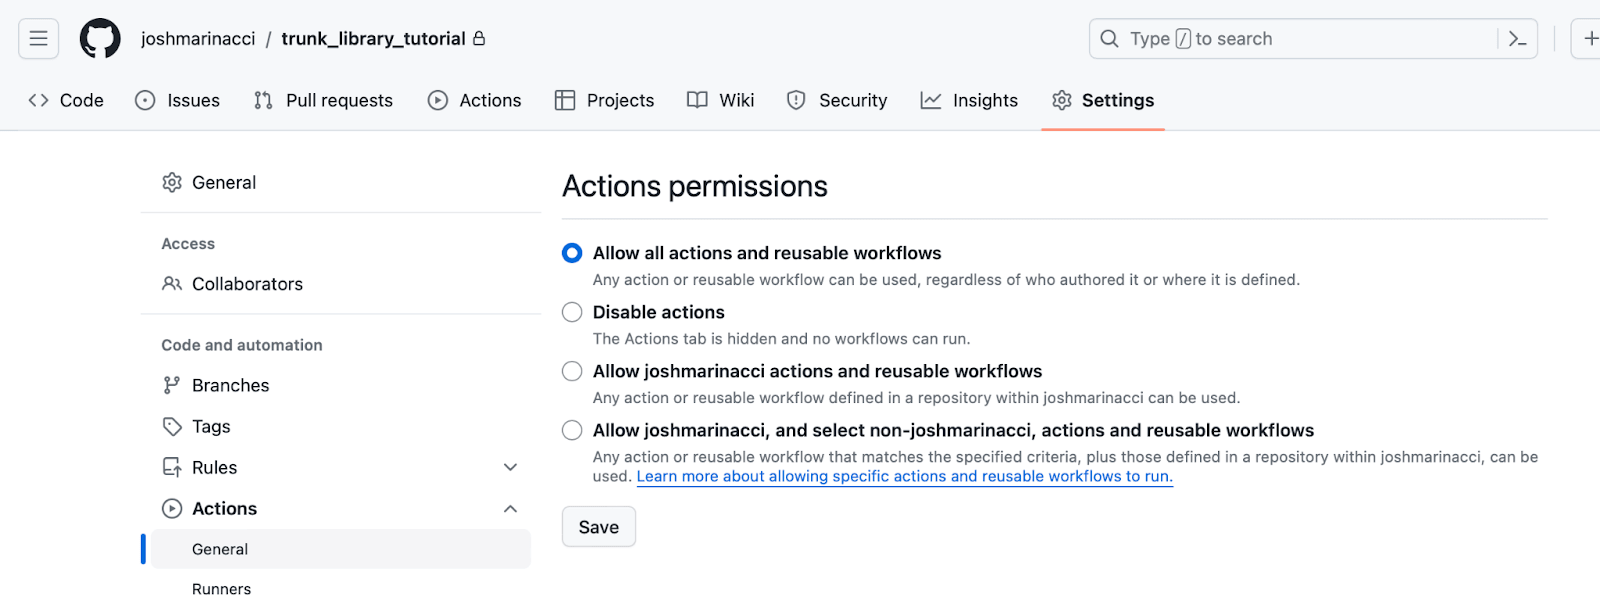
GitHub Actions are tiny YAML workflows that GitHub will run on their own servers when certain actions happen, such as when new code is pushed into a branch or when you make a new Software Release. To use Actions you first need to turn them on in your project.
In the GitHub page for your repo, go to Settings, Actions, General and turn on the appropriate Actions permissions.
Back on your local copy of the repo, create a .github/workflows/npm-run.yml file in your project with these contents:
1name: Node.js Package2on: [push]3jobs:4 test:5 runs-on: ubuntu-latest6 steps:7 - uses: actions/checkout@v48 - uses: actions/setup-node@v49 with:10 node-version: 2011 - run: npm ci12 - run: npm test
This workflow tells GitHub to create a virtual machine running Ubuntu and Node JS version 20. Once set up it will run npm ci and npm test.
Now commit and push this change to GitHub. The Actions system will immediately recognize your new workflow file and run it because it was set to run on a push (on: [push] in the .yaml file). If you go to the Actions tab of your repo on Github you’ll see the action being run. If it failed it will look like this:
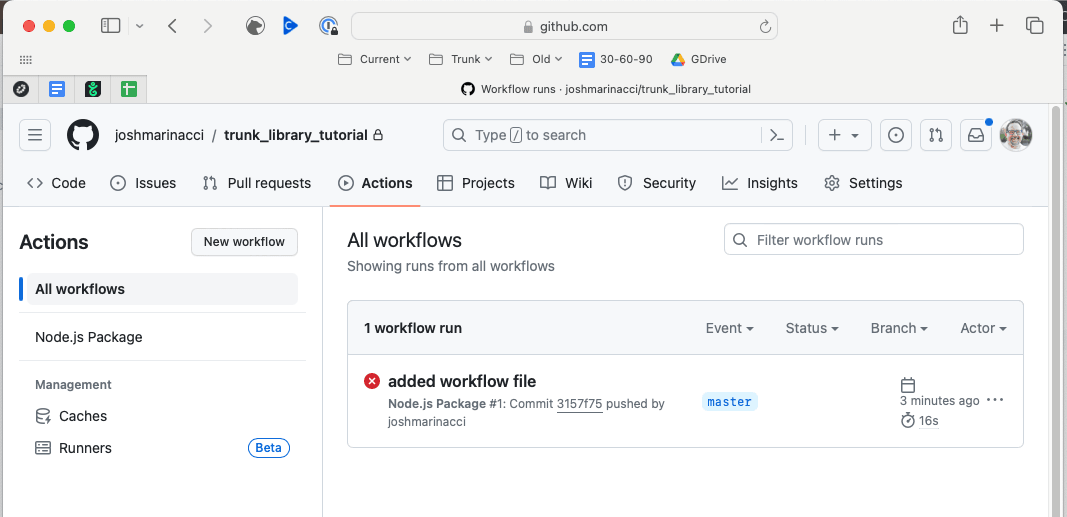
The GitHub Actions interface lets us see what the change was and why it failed. In this case it turns out that npm ci (npm clean install) can only run if I have a package-lock.json file, which I forgot to put into the repo. I’ll fix that and try it again. The package-lock.json file records not just the versions of your dependencies (which are already in package.json) but also secure hashes of every module and their submodules. This ensures the CI system will use the exact same libraries as you have locally, making your workflows more consistent and reliable. With that missing file added I can see that the action succeeded. Now my library will be built and tested whenever anyone contributes a change.
Publishing
The whole point of a JS library is to let other developers use it in their projects. We can let them do this by publishing an npm module. You can do it by hand of course, and there are plenty of tutorials on the web to do that, but we want to automate it for two specific reasons:
Automating the process means the process will be consistent. You won’t have to remember arcane instructions. Even if you make a mistake the process will catch the error. I can’t tell you how many times I’ve had to republish a package five minutes later because I forgot some dumb thing.
Automating publishing means someone else can do it! Wouldn’t it be nice if you could take a vacation and let another trusted community member publish a release without an exhaustive transfer of knowledge? This is possible with a publish action.
Before you can create a publishing workflow, you need to give GitHub secure access to your NPM project with your npm security token. You could put the token directly into the workflow but then anyone could find it in your repo and use it maliciously later. It is much safer to put the security token into the GitHub secrets manager for your project, where GitHub can keep it safe.
Create an NPM token
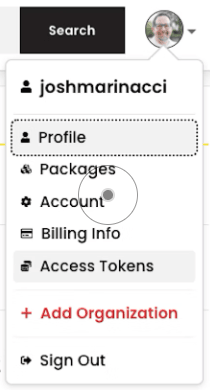
Log into your npmjs.com dashboard and go to the Access Tokens page.
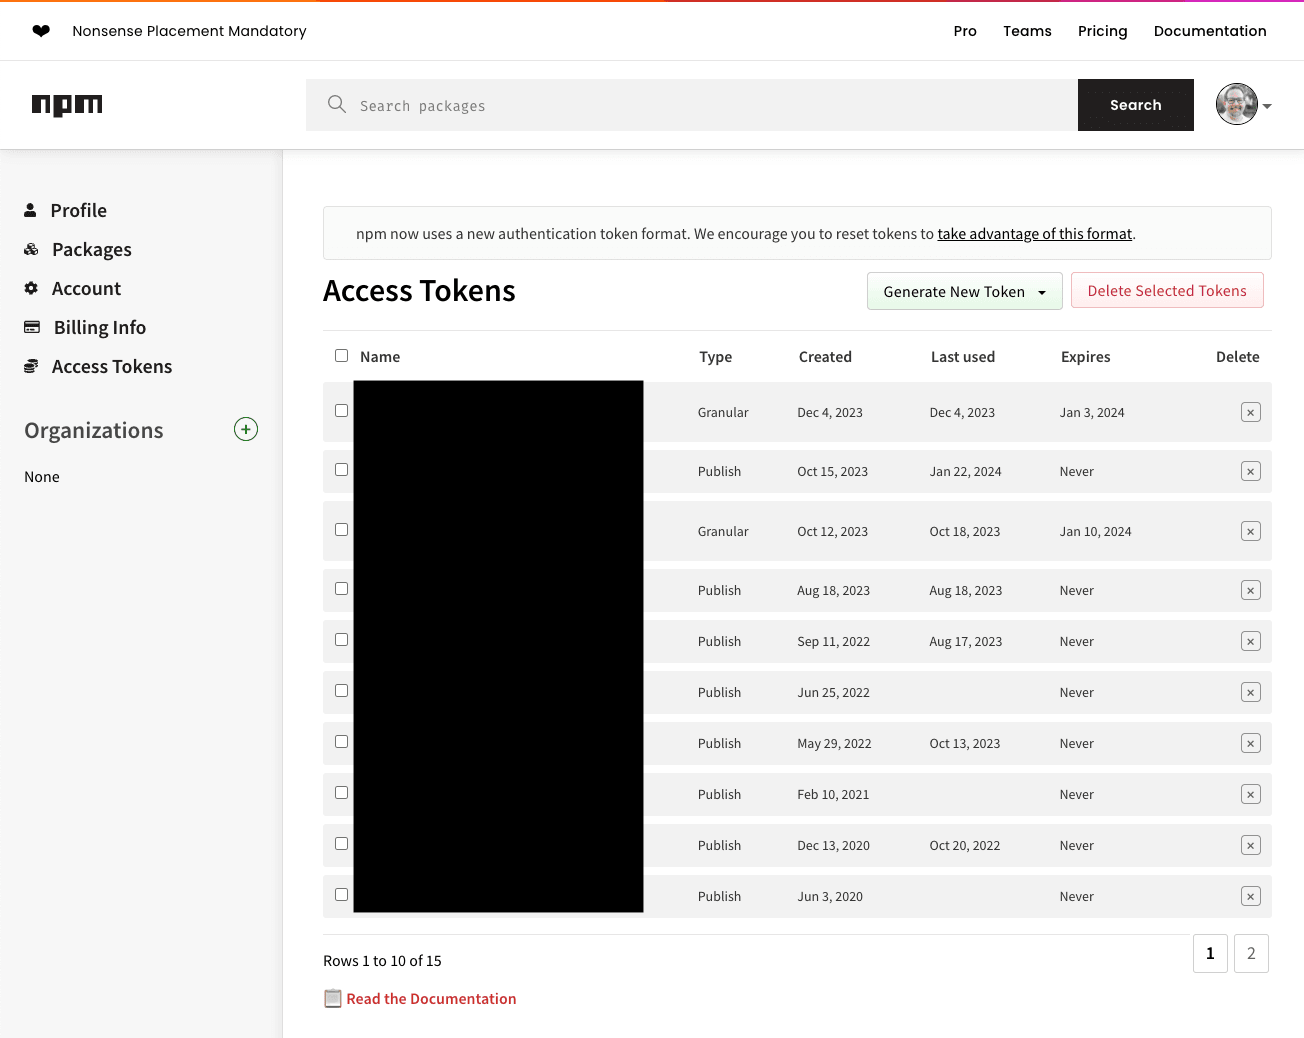
Click Generate New Token, then give your token a name and description. The default expiration time is 30 days, but I prefer longer.
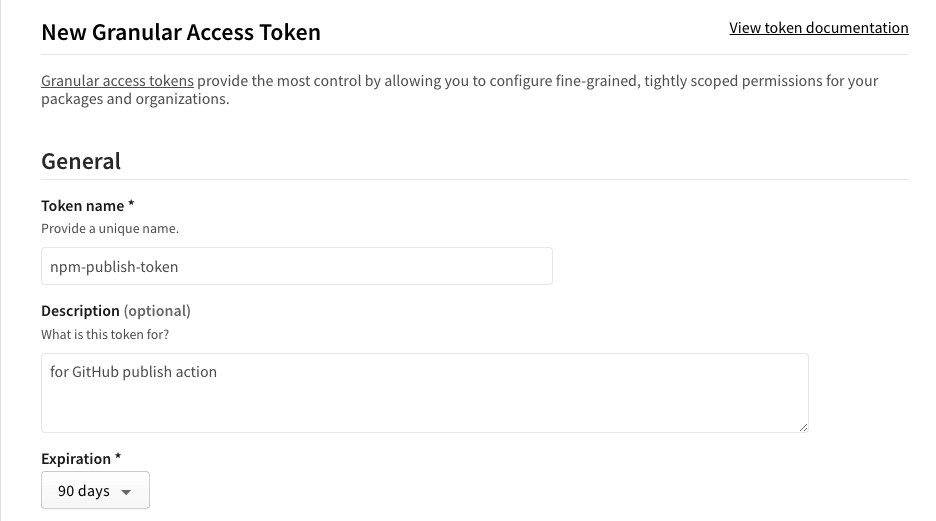
Be sure to set the permissions to read and write (since the Action will publish a package, which is a write operation) and set the scope to only be the package you are publishing.

Click Generate token then copy the actual token. Note that once you leave this page the token will never be displayed again, so don’t close the page yet.
Create a GitHub Secret
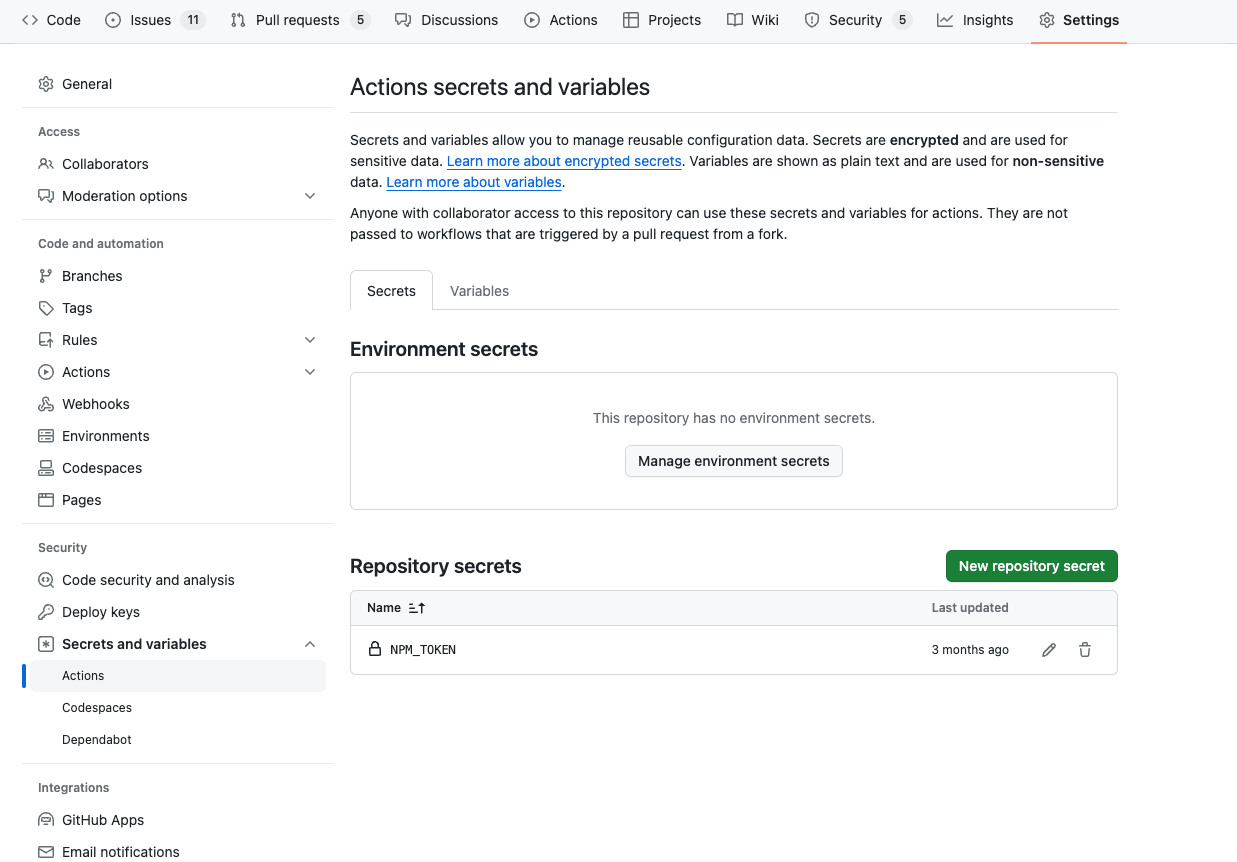
In a new tab go back to your repo on GitHub and navigate to the Settings -> Secrets and Variables -> Actions page. Click the New repository secret button.
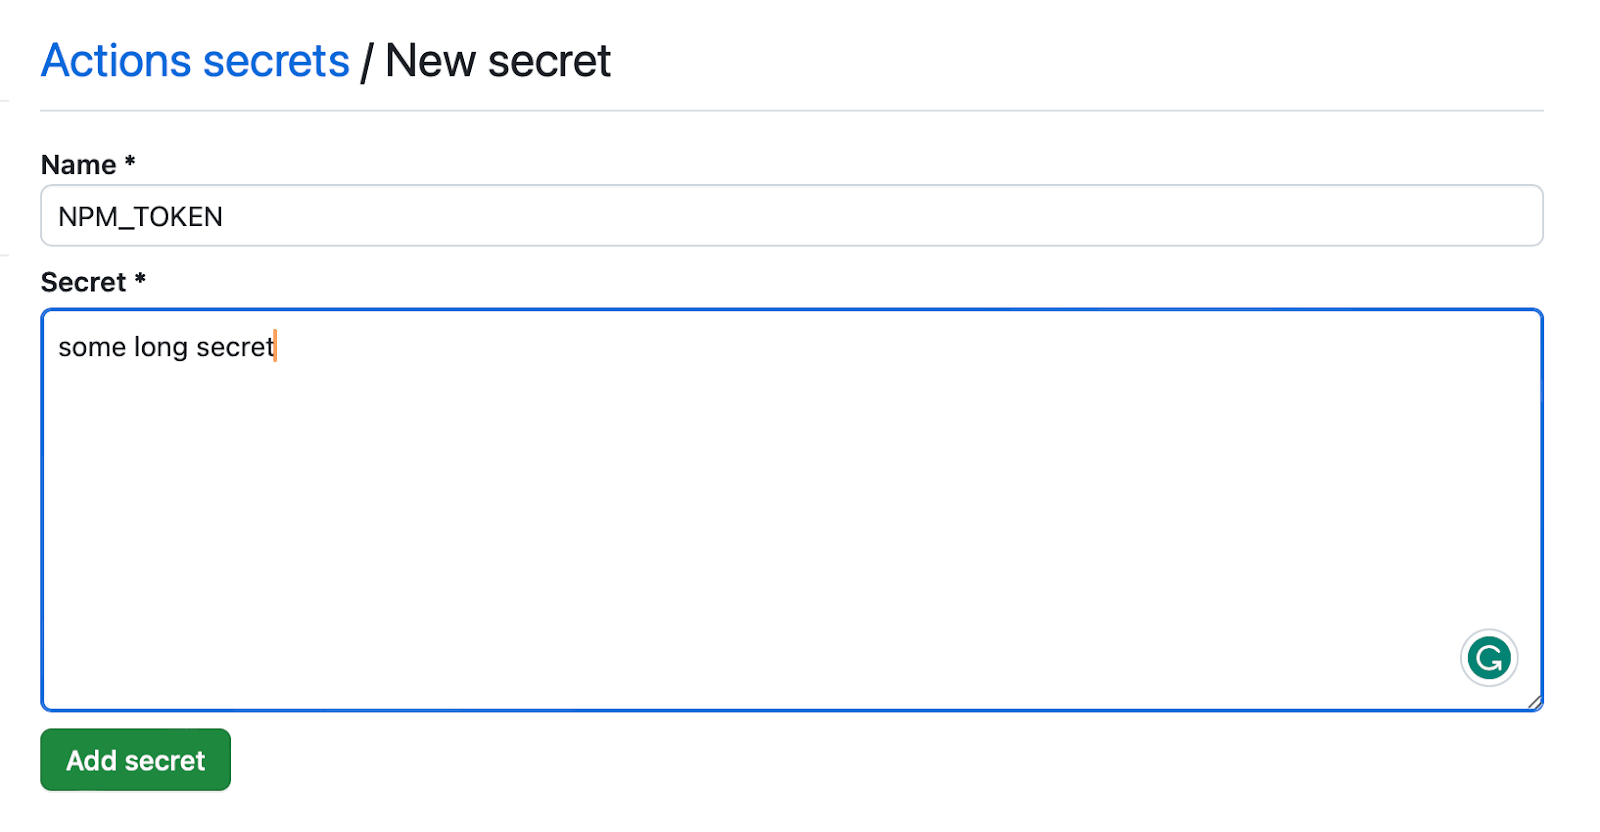
Call the new secret NPM_TOKEN and paste the token that you got from NPM into the Secret field then click the Add secret button.
Let’s create another GitHub action to publish the project. Create an npm-publish.yml file in the .github/workflows directory of your project with these contents:
1name: Node.js Package2on:3 release:4 types: [created]5jobs:6 test:7 runs-on: ubuntu-latest8 steps:9 - uses: actions/checkout@v310 - uses: actions/setup-node@v311 with:12 node-version: 2013 - run: npm ci14 - run: npm test15 publish-npm:16 needs: test17 runs-on: ubuntu-latest18 steps:19 - uses: actions/checkout@v320 - uses: actions/setup-node@v321 with:22 node-version: 2023 registry-url: https://registry.npmjs.org/24 - run: npm ci25 - run: npm whoami26 env:27 NODE_AUTH_TOKEN: ${{secrets.npm_token}}28 - run: npm run build29 - uses: JS-DevTools/npm-publish@v330 with:31 token: ${{ secrets.npm_token}}
The code above looks pretty complex, but most of it is just boilerplate imports. The core is two jobs: build and publish-npm. The build job runs npm ci and npm test to build the project. The publish-npm job uses the JS-DevTools/npm-publish library to actually publish the final library to NPM with the variable ${{ secrets.npm_token }}. This syntax tells GitHub to look up the secret you just created rather than keeping the secret in your source code where anyone can see it.
Note that before you publish using the workflow you will need to publish your library to NPM at least once by hand from the command line.
This workflow could be run on every push or just pushing to a particular branch, however I like to use GitHub releases because you can delegate access to it. After you are satisfied that your build is working you can go to the Releases tab and click on the Draft a new release button and fill out the form. When you click on the Publish Release button GitHub will run the workflow above. You can see its progress in the Actions tab.
Collaboration
We now have two layers of protection. Whenever you commit your code trunk check will check your local changes for code smell and styling. Whenever you push your code, GitHub will run the unit tests in the cloud. That’s great for you, the main developer, but what happens when someone new joins the project?
When someone else does a fresh clone of your project they can also get the same benefits. When they first clone they will need to do npm install for the libraries and also install trunk check if they don’t have it already. Then they will get the same local and remote tooling that you do. Nothing else needs to be configured! If you ever decide to add a new tool you can install it with trunk check enable <toolname> and everyone else automatically gets it installed and versioned. This greatly simplifies the process of creating a consistent development environment for contributors.
To further make it easy for contributors to actually contribute, let’s set up some useful GitHub features.
Create an Issue Template to ask the bug filer specific questions to make sure all of the important information is captured. You can create these on GitHub at Settings -> General -> Features -> Issues -> Set up templates
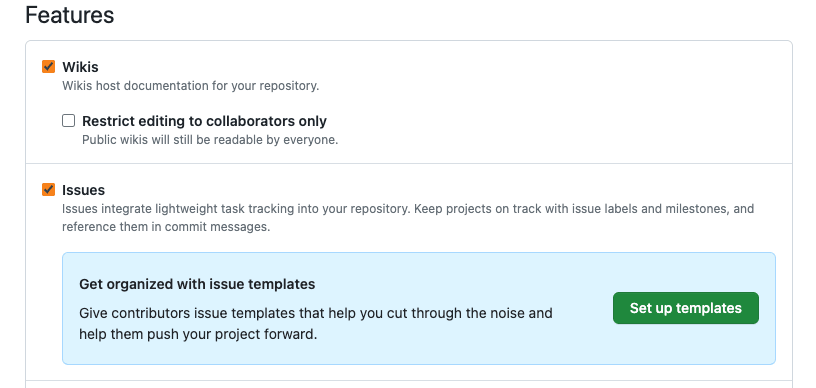
You can similarly create a Pull Request Template when people create Pull Requests for your project.
Finally tag some features and bugs in GitHub issues with the good first issue tag. These don’t even have to be code related. It could ask for improved docs or testing on certain platforms.
What have we accomplished?
While there are many other tools you can install to further improve your codebase (and Trunk supports many of them), the collection I presented above are a good start. Now you have automated error and style checks, automated building and testing your library, and automated publishing it. Furthermore, your project is now easier for contributors to actually contribute thanks to templates, good first issues, and easy tool setup.
Once you have your setup working smoothly, you may want to go back and look for issues in your older code using trunk check –all and trunk fmt –all. If you use VS Code you should check out the Trunk Check extension. It does everything we did from the command line, but nicely integrated with VS Code.
Finally, tell everyone about your project. It is now easier than ever to contribute to your project because you did the work to make it friendly to newcomers.


